Ski Skins - Homemade How-To
Posted: January 4th, 2013, 5:40 pm
With the oversized monster motor in our kitty, plus the countless pounds of tin, fiberglass and bondo, it is a little front heavy. Thus, sticky snow almost stopped it in its tracks.
I'd been thinking about and looking for ski-skins for a while as I don’t have the funds to buy plastic skis. Didn't see any anywhere, so I decided to make my own. Here's how...
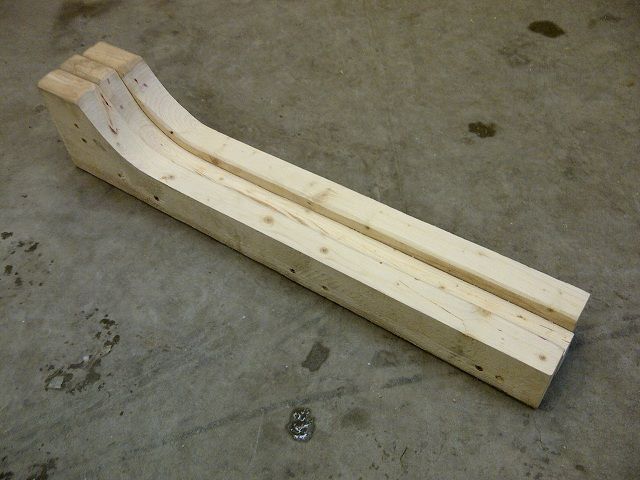
I made a mould out of 2x6's. Traced the shape of the ski, cut and sanded it. The middle board needed to be cut 1/4" narrower:
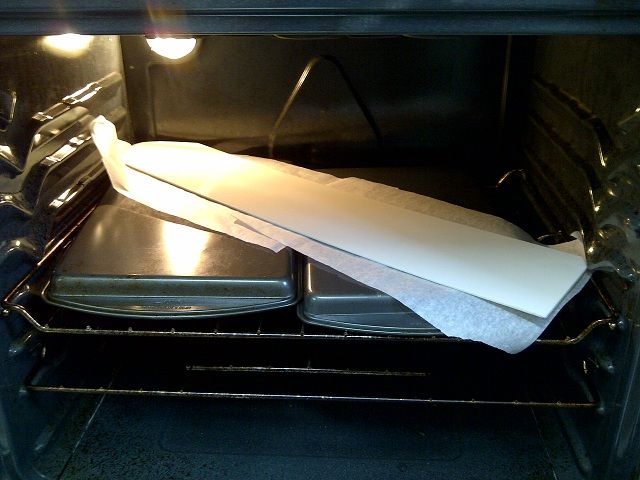
I got a 2'x4' sheet of 1/8" puckboard (HDPE) for $20. Cut it a bit oversized and put it in the oven. It worked best with the plastic on a smooth pan so you don’t get marks from the rack, and some parchment paper to keep it from sticking. Heated the oven to 300, and baked for about 5-8 mins, watch closely for it to be soft, but not melting:
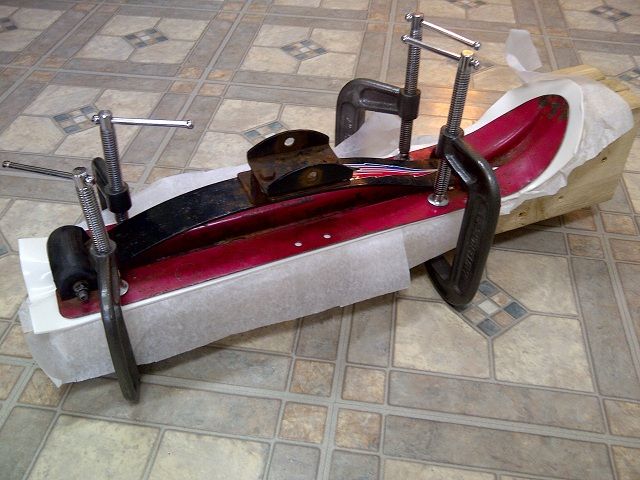
Carefully pulled the plastic from the oven and placed it on the mould. Quickly placed the ski on top and pressed it down, stood on it, then clamped it. Tossed the whole thing outside to cool. Note that on the next tries I did not keep the parchment under the plastic, cause I think it caused wrinkles on the plastic:
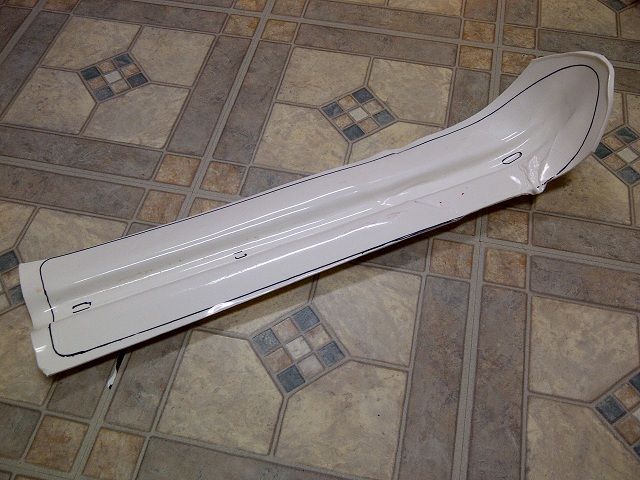
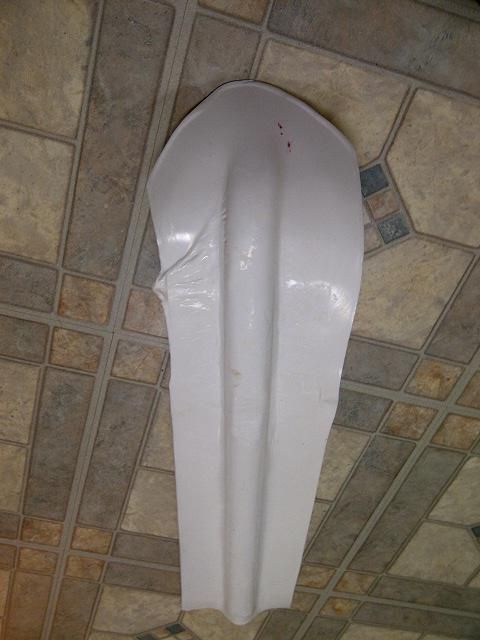
Here is what the skin looked like after it cooled. It shrinks quite a bit as it cools. It was a bit rough, but useable:
Finally I trimmed them to size with a jigsaw and sanded the edges free of burrs. I also used a belt sander to remove any big bumps. I welded some fresh bar onto the runners and re-installed.
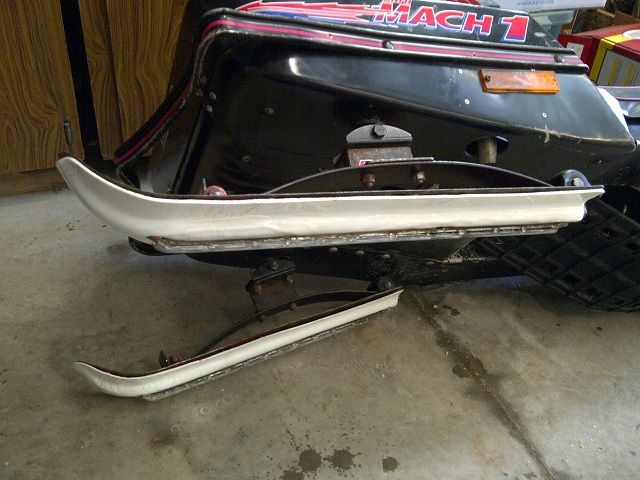
I ended up not needing anything other than the runners to hold them on the skis, and they seem to be keeping their shape nicely. I have not had the right snow conditions to see how much of a difference they make. It will also be interesting to see how well they hold up.
They were trickier to shape than I thought. I had 3 useable ones turn out, and 3 that did not. The first one failed because the mould was not quite right and I baked it right on the oven rack - ended up with lots of grille marks and ridges. The other 2 fails were because I was not careful enough and the plastic folded over on itself while taking it out of the oven. It welds together instantly.
I have 2 blanks left, so hopefully I can make one more set for our 2nd kitty.
I'd been thinking about and looking for ski-skins for a while as I don’t have the funds to buy plastic skis. Didn't see any anywhere, so I decided to make my own. Here's how...
I made a mould out of 2x6's. Traced the shape of the ski, cut and sanded it. The middle board needed to be cut 1/4" narrower:
I got a 2'x4' sheet of 1/8" puckboard (HDPE) for $20. Cut it a bit oversized and put it in the oven. It worked best with the plastic on a smooth pan so you don’t get marks from the rack, and some parchment paper to keep it from sticking. Heated the oven to 300, and baked for about 5-8 mins, watch closely for it to be soft, but not melting:
Carefully pulled the plastic from the oven and placed it on the mould. Quickly placed the ski on top and pressed it down, stood on it, then clamped it. Tossed the whole thing outside to cool. Note that on the next tries I did not keep the parchment under the plastic, cause I think it caused wrinkles on the plastic:
Here is what the skin looked like after it cooled. It shrinks quite a bit as it cools. It was a bit rough, but useable:
Finally I trimmed them to size with a jigsaw and sanded the edges free of burrs. I also used a belt sander to remove any big bumps. I welded some fresh bar onto the runners and re-installed.
I ended up not needing anything other than the runners to hold them on the skis, and they seem to be keeping their shape nicely. I have not had the right snow conditions to see how much of a difference they make. It will also be interesting to see how well they hold up.
They were trickier to shape than I thought. I had 3 useable ones turn out, and 3 that did not. The first one failed because the mould was not quite right and I baked it right on the oven rack - ended up with lots of grille marks and ridges. The other 2 fails were because I was not careful enough and the plastic folded over on itself while taking it out of the oven. It welds together instantly.
I have 2 blanks left, so hopefully I can make one more set for our 2nd kitty.